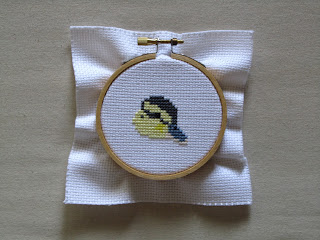
Out of this pile of forgotten craft supplies came a set of cheap three inch embroidery hoops.These weren't the type of hoops I would want to sew with, but they do make nice simple frames. Along with some 14 gauge Aida cloth and thread I decided to make some baby animal faces to help decorate the rearranged space. Because the hoops were so small and the cloth gauge was so big, I also decided to make the resolution of each animal face pretty low and simple. This also meant that each face would be faster to make and I could move on to finding uses for more unused craft supplies.
Feel free to change the thread, the gauge, or the size. Just please don't try to sell the patterns as your own.
If you have any questions about the pattern, please email me at GridMammalCrafts@gmail.com and I'll get back to you as soon as I can.
Making each individual sampler required:
1) Three Inch Wood Embroidery Hoop
1) Five Inch Square Piece of 14 Count Aida Cloth
1) Embroidery Needle
1) Pair Embroidery Scissors
1) Piece of Felt (large enough to cover the back of the hoop with sampler)
Desired Embroidery Thread
Craft Glue
To begin with each animal sampler was stitched onto its own cloth. (Please scroll down to see patterns.) After the stitching was complete, the cloth was lightly ironed using a pressing cloth and then placed and centered into its own embroidery hoop.
When the sampler is framed as desired and the hoop is tightened, I put a running stitch around the remains of the Aida cloth about a quarter to a half of an inch away from the frame, being careful not to get to close to the edge of the cloth, and cut off the extra cloth points. After the running stitch is run completely around the rim of the hoop, I pull the thread tight, pulling in the remains of the cloth towards the center of the hoop, and tie the tread off.
Then, using the hoop as a stencil, a piece of felt is cut for each hoop. Glue is applied to the back of the hoop close to the cloth and the felt is pressed onto the back of the framed sampler. Any glue that leaks out is quickly wiped away and the entire sampler is pressed between two weighed objects overnight. (Phone books work well.) After the glue is dried and set, and extra felt around the edges can be trimmed away and each sampler can be hung as desired.
Now for the sampler patterns.
Rabbit
Kit’s Face
Cross
Stitch Pattern
Finished Size on 14 Count Aida Cloth:
Duckling’s
Face
Cross
Stitch Pattern
Finished Size on 14 Count Aida Cloth:
Otter
Pup’s Face
Cross
Stitch Pattern
Finished Size on 14 Count Aida Cloth:


